HOW TO USE SUGAR WAX
Sugar Waxing is a body care practice that has been around for millennia. It improves skin quality and removes body hair at the same time.
In more recent history, sugaring has gained popularity worldwide as a sustainable, gentler alternative to hot salon wax and not so environmentally friendly plastic disposable razors.
Created by heating organic lemon juice, pure cane sugar, and filtered water to the perfect consistency; we developed a beginner-friendly sugar wax that is gentle on skin & works with all hair types.
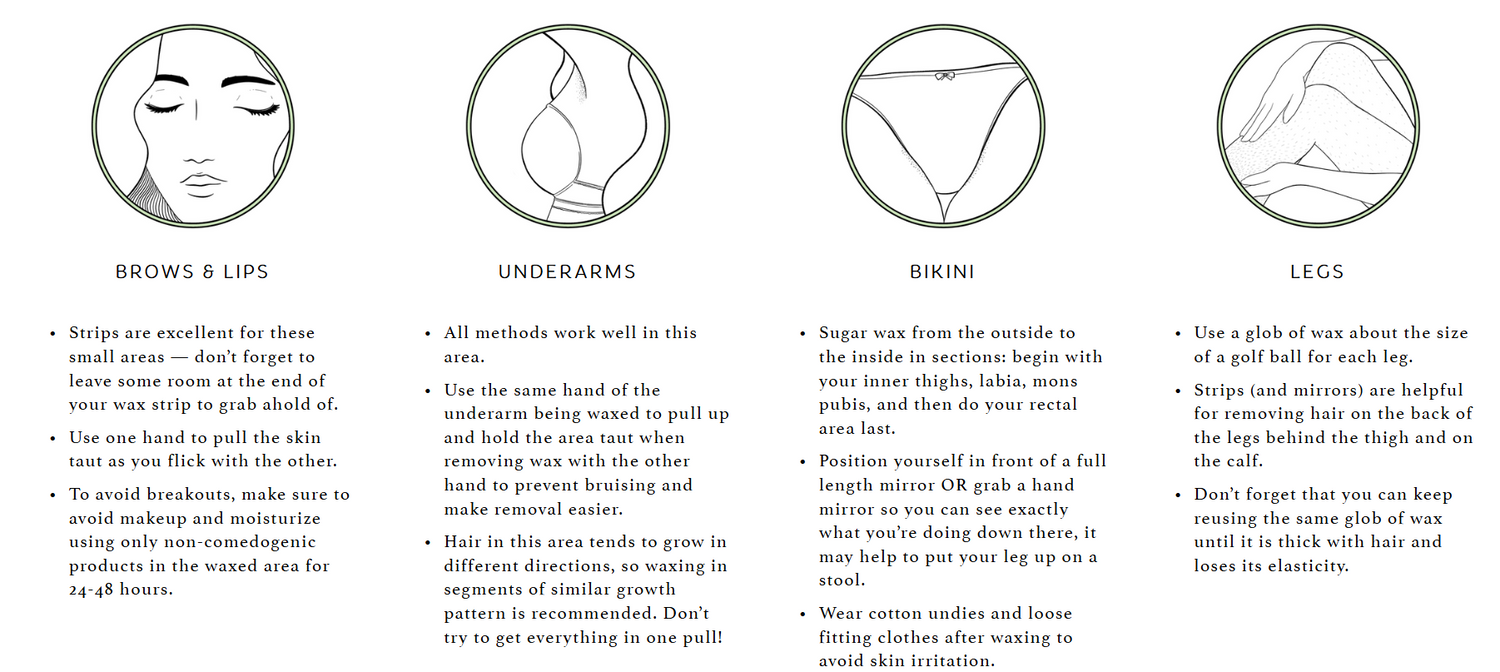
Shape or remove hair from head to toe. We have your brows, face, underarms, bikini & legs covered.
1. PREP YOUR SKIN
Start with clean, dry skin.
If there is any oil, lotion, or sweat on the skin, the wax may not adhere properly.
We recommend using a mild soap to wash oils and lotions off the area and pat dry. This includes washing your hands thoroughly as well if choosing to wax without gloves.
2. PREP YOUR SUGAR WAX
Your sugar wax needs to be the right consistency to give you the best results.
If you store your wax in the refrigerator, you will need to either microwave your jar briefly (in 5-7 second intervals) or place your lidded jar in a bowl of warm (think, bath water temperature) water for 5-10 minutes until it is soft enough to scoop out of the jar with your fingers or our wax spatulas. The sugar paste should never be hot or runny. In case it accidentally gets too hot, you can refrigerate it until firm enough to try again.
When your wax is at room temperature, it should be just loose enough so you can slowly ease it from the jar. If you wish for a bit more ease with removing it from the jar, you can follow the above instructions. If you store it on the counter, you are ready for the next steps.
P.S. Ideally, you will want to be sugaring in either an air conditioned environment or in similar conditions.

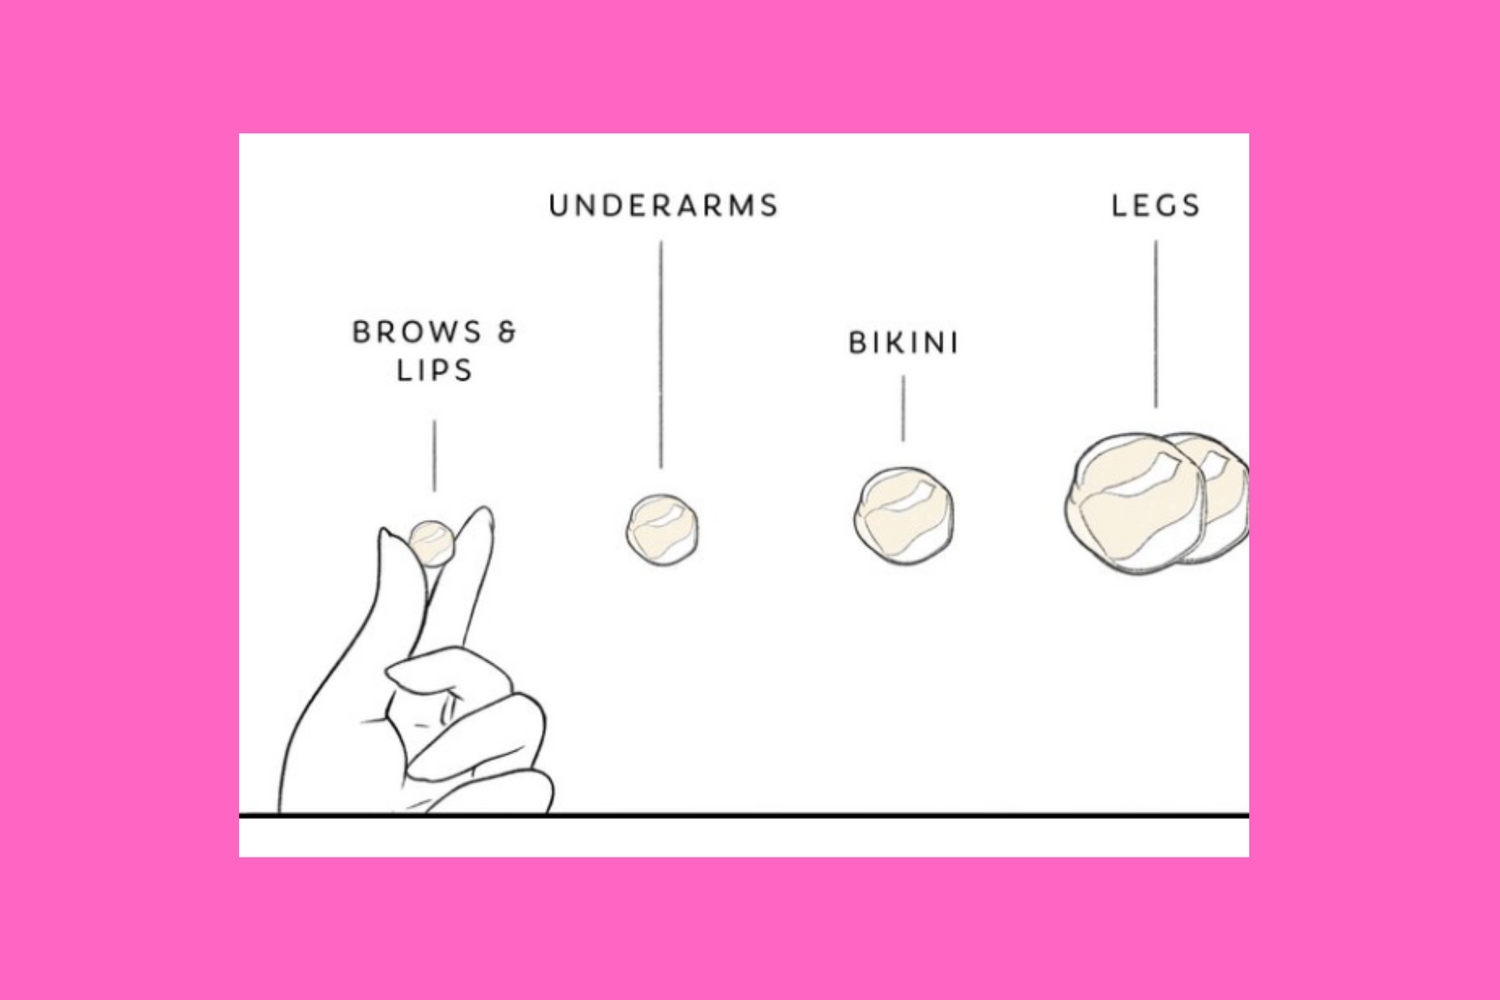
Grab out your piece of sugar wax using this chart to estimate how much you’ll need.
This chart is a recommended starting point. The amount you need will vary from person to person. The more practiced you are with sugaring, the less you will need.
It may be easier to remove (especially if you have long nails) with a hard tool like our seashell spreader, but you can also use your hands.
3. KNEAD YOUR WAX
To finish prepping your wax, knead it with your hands until it turns opaque, like golden taffy.
This final step warms the wax up to your body temperature and makes it an ideal consistency for spreading. If you warmed your sugar in the microwave [or used the warm water method] and it is gooey enough to spread on your skin with ease, you can skip kneading and continue to the next steps!
4. APPLY YOUR WAX
Sugar wax should be applied in the opposite direction of your hair growth pattern.
- Take your sugar wax and place it at the base where you want to wax, allow it to soften on your skin for a moment, then slowly start spreading it in the opposite direction of your hair growth pattern using your hand or a tool (you can use something like our seashell applicator or other things you may have lying around like an old credit credit card).
- Mold the wax to the skin, going over the area 3 times to to ensure the wax encases and adheres strongly to all the hairs.
Note: If at any point you find yourself in a sticky situation, don’t worry! Sugar wax is water soluble - so you can easily dissolve it from your skin with warm water, pat the area dry, and start over.
5. REMOVE YOUR WAX
Sugar wax should be removed in the same direction of your hair growth pattern.
- Before you remove the wax, make sure you are holding the skin of the area being waxed as taut as possible. This is so important for preventing bruising, as it keeps the skin from lifting with the wax. If this step is not followed, the skin will lift and “bounce back“ when you sugar the area and this can damage the underlying tissues, causing bruising.
- When you are ready to remove the wax, pull it in one swift motion in the same direction your hair growth pattern follows. The motion should not pull up (as this could cause “bounce back” and lead to bruising). It should pull parallel to your skin.
- Ready? One, two, three… flick!
Note: Don’t throw away the wax just yet! Unless you are using strips, you can keep reusing the same glob of sugar wax until it is thick with hair and has lost its elasticity.
6. POST-WAX
Follow these steps after sugar waxing to minimize irritation and promote healthy skin recovery.
- After waxing, remove any residual wax from your skin using warm water or a clean, damp cloth.
- Apply soothing aftercare such as aloe or our After Wax Serum to calm the skin and prevent any potential irritation.
- Avoid hot baths, saunas, sex (if you waxed your bikini area) and swimming pools for at about 24 hours after waxing to allow the skin to recover.

